DIY dough toys. Master class on testoplasty. Salt dough basics. #1 Snowflake from dough with openwork print
0 62 411
Modeling is one of the most useful activities for kids. With its help, not only fine motor skills of the hands develop, but also perseverance, imaginative thinking and coordination of movements are developed.
One of the best materials for modeling with a child is salt dough. It is absolutely safe, does not contain harmful additives and is easy to use. DIY salt dough crafts will be wonderful souvenirs for your relatives and friends.
Universal Recipes
Salt dough recipes are plentiful. Each master makes his own additives in them, choosing the right consistency. The main products for kneading dough are salt, flour and water.Depending on the purpose, its density may be different:
- dense dough - for large parts and creating massive panels;
- universal dough of medium consistency - it is convenient to make small pictures and figures from it;
- soft dough - gentle and pliable, it is suitable for small elements, exquisite flowers and figurines.
dense dough
For work you will need:- wheat flour - 1 part;
- food salt - 1 part;
- water - 0.7 parts.
That is, to knead this type of dough, you need to take one identical measure (glass, cup, tablespoon) of salt and flour and 0.7 of the same measure of water.
In a deep bowl, combine the dry ingredients and gradually add cold water. The dough should be homogeneous and very dense. There will be grains of salt in it - this is normal, do not worry. Depending on the moisture and quality of the flour and salt, a little more or less water may be needed. Therefore, you can not pour it into the dough all at once.
Medium consistency dough (universal)
For work you will need:- wheat flour - 1 part;
- water - 1 part;
- food salt - ½ part;
- finely ground salt (extra) - ½ part.
soft dough
For work you will need:- wheat flour - 1 part;
- hot water - 1/4 part;
- finely ground salt (extra) - 1 part;
- PVA glue - ¾ parts.
This dough is ideal for complex work. It perfectly holds its shape, retaining prints and the texture created on it. Its quality directly depends on the quality of the selected adhesive.
Figures molded from salt dough with glue are different special strength. They will please their owner for more than one year.
- If you plan to color finished products, it is better to use wheat flour, although rye flour can also be used for salt dough.
- You can not take iodized salt - finished figures may crack when dried.
- The dough can be tinted during kneading. For this, food coloring or watercolor is used.
- The finished dough must be wrapped in cling film or a plastic bag to prevent it from drying out.
- A failed dough can be reanimated. You need to add a little more flour to the watery one and knead again, moisten the too tight dough with water and knead, achieving the desired consistency.
- Do not add grease or hand cream to the dough to be dyed, as the paint will not adhere evenly.
- The finished dough should be stored in the refrigerator for no more than 2 days. It loses its qualities and it will be inconvenient to work with it.
- Volumetric products are best sculpted on wire or cardboard frames so that they do not fall apart.
- Crafts can be dried naturally by leaving them for a couple of days, baked in a warm oven, or left next to the radiator. It is categorically not recommended to put figurines on the battery itself to avoid cracking them.
- It is best to paint crafts with acrylic paint or gouache. Watercolor should not be used: there is a risk of soaking and spoiling the product.
- The junction of the parts must be moistened with water using a brush. So they are firmly and quickly connected.
- The finished souvenir can be covered with colorless nail polish or acrylic varnish. This will protect it from moisture and the paint from fading.
Cute hedgehog - toy for kids
Want to know what you can do with a child from salt dough? Start with the simplest crafts. The younger your baby is, the easier products for co-creation should be. Try to mold a prickly hedgehog, and a detailed description of the process in this MK guarantees an excellent result and a good mood from a useful activity.
First of all, prepare the universal salt dough and nail scissors. Roll a drop-shaped blank from a piece of dough.

The eyes and nose of a hedgehog can be made from beads, black peppercorns, or pre-dyed dough.

Needles are made with incisions. Make small cuts with the tips of the scissors, lifting the needles up.

Perform the next row in a checkerboard pattern - with an offset. Row after row, make cuts until the entire back of the hedgehog is covered with needles.

Dry the finished toy in the oven or just in a warm and dry room. If you wish, you can color it or entrust this important matter to a child.

Original souvenir - funny dachshund
You can start preparing for the upcoming New Year holidays in advance and make a funny dachshund as a gift to your friends.
For work you will need:
- salt dough universal (see recipe above);
- cardboard, a simple pencil, scissors;
- paints and brush;
- a piece of rope;
- clear nail polish;
- toothpick;
- foam sponge;
- glue "Dragon".
Transfer the template to a sheet of cardboard and cut.

Roll out the dough to about 5mm thick on baking paper. Attach the pattern and cut out the outline of the dachshund along it. Carefully remove the trim so as not to deform the workpiece.

Roll up two balls and form oblong dachshund eyes out of them. Glue them on a drop of water to the head of the workpiece. Moisten all sections of the dog with water and smooth with your fingers to remove any bumps.

From two small pieces of dough, make eyelids and glue them over the eyes. With a toothpick, outline the ear, paws, mouth, nose and body contours.

Now you need to add volume to the workpiece. Roll the dough into an oval, glue it on the ear and smooth the joint with a wet finger.

Similarly, add volume to the back of the dachshund and its tail.

Push the oblong dents around the perimeter of the figurine with a toothpick. Make them randomly of different lengths from the edges of the body to the center.

It's time to dry the workpiece in a warm oven. Bake it until it is completely firm.
A dry figure needs to be painted. Cover with black gouache all areas where there are bulges and dents.

After the first coat of paint has dried, paint the dachshund yellow. Put some paint on the foam sponge and toned the whole body, while the dents should remain black - do not overdo it.

Draw white eyes on the dried dachshund. Make any inscription you want.

Glue a piece of string to the back of the craft.

Cover the product with clear varnish and let it dry. The result of the work done is impressive - the mischievous puppy is ready.

Dog with original coloring:


Spectacular fish - step by step master class
Try to mold a beautiful fish with your child. Just follow the detailed instructions - and even a little helper will be able to master this sculpting technique.
For work you will need:
- salt dough universal;
- tassel;
- corrugated cap of a felt-tip pen;
- ruler.

Squeeze the dough on one side of the circle with two fingers, forming a ponytail.

Correct it and smooth out the bumps.

On the opposite side, make the mouth of the fish with the handle of the brush.


With the edge of a ruler or the blunt side of a knife, push the prints on the tail and fins.

Roll up small balls and glue them on the head of the fish. These will be the eyes.

From smaller balls, make pupils and press them to the eyes with the handle of the brush.


It's time to decorate the workpiece. Push the first row of scales with the cap of a felt-tip pen.

Roll up many small balls. Glue them on a drop of water to the body of the fish just behind the prints of the cap and flatten with the back of the brush.


If there is a suitable print, make prints in the shape of a starfish, if not, get by with a familiar cap or take another template.

Then push two more rows of cap prints.

Roll up a thin sausage to decorate the ponytail.

Glue it to the workpiece on the edge of the tail. Fill in the entire tail in the same way.

Next, randomly stick and push a few more small balls.
Dry the resulting workpiece in a warm oven.

Color the fish according to your idea of beauty and the colors available. If you stick a magnet on the back of it, it will proudly take its place on the refrigerator, decorating the kitchen of its lucky owner.
Here are some more fish ideas:


Cheerful boletus mushroom
The initial stage of learning to sculpt is already over - you can take on more complex products from universal salt dough. Try to master the lesson of making a funny big-eyed boletus. Such an interesting mushroom will be appreciated not only by a child, but also by an adult.
For work you will need:
- salt dough universal;
- burned out light bulb (classic pear-shaped);
- cardboard;
- acrylic paint or gouache;
- foil;
- paper napkins;
- masking tape;
- Super glue.

Cut a ring out of cardboard and put it on a light bulb - this is the basis of the future mushroom cap.

From crumpled paper napkins, form a hat of the desired size. Fasten the structure with adhesive tape.


As a result, such a preparation is obtained.

Wrap the hat in foil for extra strength.


For the hat, you can use the dough of any color, later the whole toy will be painted. Roll out a piece of dough into a circle at least 3 mm thick and wrap around the top of the mushroom cap.

Remove the hat and close the bottom.

Use the blunt side of a knife to push through the strips.

Attach the hat to the stem of the mushroom with superglue or Moment. It should be slightly tilted towards the back.

Take care of the decor. Blind and fix the handles, legs and spout on the fungus.


You can decorate the figurine with a funny caterpillar or mold another decorative element, such as a ladybug.

Dry the finished workpiece.

Color the figurine, draw eyes and nose and varnish. Amazing fungus is ready. Salting and eating it will not work, but decorating a shelf with it is easy.

Funny pigs pendants
Such funny pendants are an idea for an unusual Christmas decoration or a nice souvenir for your dear people. Such a thematic present will be most welcome, because the patron saint of 2019 is a yellow pig.
For work you will need:
- salt dough universal;
- toothpick;
- thin rope;
- paints and brush;
- foam sponge;
- black gel pen;
- Super glue.
The dough is an amazing material for modeling, because children of different ages can work with it. Properly prepared salt dough will help realize any creative ideas and teach children how to make unique crafts. If you want to do salt dough figurines, then we offer you a master class with photos step by step for children from 4 to 10 years old. Spend your leisure time interesting and invent what else you can do yourself from the dough.
How to cook salt dough
Today, many recipes have appeared for making salt dough, which is suitable for sculpting figures. We offer one of the most common recipes that is easy to prepare at home. For this you will need:
- 3 cups flour
- Glass of water
- Two tablespoons of salt

Step by step photo of making salt dough for kids
All these ingredients must be mixed and knead the dough well, like dumplings. If you plan to make thin dough figures for children, then add a little PVA glue or starch to the mixture. These components will increase the strength of products.
Making figurines step by step
First, roll out the dough into a layer of suitable thickness. If you decide to do some modeling with the kids, it's best to use cookie cutters to cut out the pieces from the dough. Even a 4-year-old child can handle this task. After the hearts, Christmas trees, birds and stars are cut out, you can start decorating them. To do this, you can use seeds, grains and cereals. When the salt text figures are ready, they will need to be dried. Dry crafts from dough in the oven or in a natural way.

Photo of figures from salt dough for children
Children 10 years old will be able to perform step by step more complex figures from salt dough. Invite them to take a toy and make a voluminous craft on it. For example, try making a mouse out of salt dough. To do this, all the details are molded separately, and then connected to each other.

Salt dough mouse, step by step photo tutorial
It is enough just to make an owl figurine from salt dough with your own hands. To do this, with the help of a spoon, the test is divided into two parts - the head and torso. Give these parts the desired shape and connect them together.

Photo of an owl from dough
Separately, you can make a collar for an owl from salt dough, for this, small cuts are made on the strip. Fasten the collar to the body of the owl, and then use a knife to highlight the wings.


Step by step we decorate the dough figure
You can decorate crafts from salt dough with paints or gouache. To add shine, the craft is varnished. Some children use beads and beads to decorate salt dough figurines.

Master class with step by step photo: lamb
- This is a fascinating direction in needlework, which is especially liked by children. To make figures from salty text, you do not need to buy expensive materials, all the ingredients can be found in your kitchen. Try to do salt dough crafts step by step and share new master classes with experienced needlewomen.
Elizabeth Rumyantseva
For diligence and art there is nothing impossible.
Plastic and accessible to everyone, the material allows you to create unique things for the interior. Salt dough has long been used to make beautiful crafts. From a pliable mass, together with a child, you can fashion figurines of animals, New Year's compositions and even whole thematic pictures.
Features of working with salt dough
Everyone can make crafts from this material - a small child who begins to practice the art of modeling, and an adult who has mastered the process in kindergarten. So that the molded product does not deteriorate, you need to do everything right - prepare the mass for modeling directly and dry the figures. Coloring also has its secrets, which you will definitely learn about.

- How to make salt dough for modeling
The consistency is easy to work with, but for a successful craft, you need the right kneading. If you correctly observe all the proportions indicated in the master classes, then you can make a pliable material. The figures made from it retain their original appearance. There are two popular salt dough recipes that are successfully practiced among homemade hand-made lovers.
Recipe #1
- wheat flour (WS) - 500 g;
- water (necessarily cold) - 200 ml;
- salt "Extra" - 200 g.
According to this recipe, the mass turns out to be of high quality, plastic and edible (which is important). All components of the material can be eaten, so it is great for working with young children during developmental activities. If a child eats a finished craft, then he will not harm his own health. Products made from safe material are the best choice for a curious baby.
Recipe #2
Also suitable for sculpting with kids, because the consistency is plastic and you can sculpt anything you want. During the game, the child must be well monitored so that the mass is not eaten. For cooking, you need to stock up on the following ingredients:
- white flour of the highest grade - 500 g;
- water (cold) - 200 ml;
- PVA glue - 2 tbsp.
The adhesive component in the composition guarantees the stability of the product made from the mass. Such a composition is easy to tint and color, and in addition, it has a long solidification period (it is easy to correct minor flaws in the finished craft). Try both recipes to find the best one for your own tasks (depending on age, skill, etc.).
- How to dry salt dough crafts

- an obligatory stage in the creation of crafts from salt dough, thanks to which products acquire strength. The drying process requires certain conditions, because at room temperature the figurine will not reach the desired condition, because in twenty-four hours it will dry out only one millimeter. In the summer you can try to put it in the air, but this will not give much results. It is best to use the oven:
- At a temperature of 75°C, the drying time will be an hour.
- At a temperature of 100 ° C - an hour.
- At a temperature of 120 ° C - half an hour.
- At a temperature of 150 ° C - half an hour.
Large items should take longer to dry, while smaller items can take less time to dry. To prevent the dough from sticking, the baking dish must be covered with foil. Decor in the form of beads, rhinestones, beads should be dried at a temperature not exceeding 120 ° C. Do not use a microwave oven or put crafts on a hot battery, otherwise they can instantly deform and crack. From time to time you need to turn the figures in the oven so that they are evenly baked on all sides.
- How to color dough products
The created and dried figurine can be painted in any of your favorite colors. The best choice for these purposes would be acrylic paint or gouache. The dyed product must be covered with colorless nail polish so that the paint lasts for a long time and does not lose its juiciness and brightness over time. You can make a colored mass by adding the desired tone (it is better to use food coloring) during flour kneading.

What can be done from salt dough with your own hands
Having mastered the technique of creating salty material for modeling, you can easily achieve mastery in which you can make crafts of any complexity. A new hobby may interest not only an adult, but also a child. Plastic dough is a wonderful material for creativity, the development of hand motor skills, concentration and much more. There are a lot of ideas on what can be made from modeling dough, while crafts can be of any complexity and are interesting for children of all ages.
Simple figurines for children 2-3 years old
Having plastic material at hand, you can organize a developmental activity for the youngest children. What can be molded from salt dough for a two-year-old baby? First, you should introduce the crumbs to the material - let them hold the mass in their hands, then clearly show what the dough is capable of, that is, make a bun or a snowman.
Small children are not capable of grandiose crafts, so it's best to start by following the easiest method and doing everything in stages:
- Roll out the dough with a rolling pin, and then press small objects in the form of figured pasta, beans or buttons onto the finished layer.
- Cut out the dough with cookie cutters.
- Roll balls of different sizes from plastic material, creating little men, a snowman, a bun, a smeshariki.
- Roll sausages, making snails, caterpillars and other elementary figures.

For children 3-4 years old
For children of three or four years old, one rolling is not enough, because the child has already grown up and can perform more complex tasks. Salt dough pictures will be an interesting idea for creative activities. On a piece of paper, the kid with the help of an adult will create a three-dimensional image, and then color it. Pictures can convey any plot: from the seasons and mini-images of the country to episodes of fairy tales and cartoons.

For modeling with children 5-6 years and older
If you don’t give intricate tasks to young children, then creative six-year-olds can master complex crafts from salt dough. For example, these can be figurines in the form of a voluminous sheep, a mouse on cheese, or an original vase with a chic bouquet of flowers. Children at the age of five or six can master the technique of manual work using a salty consistency. Following the example of an adult, a child can even cope with those products that require a significant concentration of attention and manual dexterity.

How to sculpt crafts from salt dough - step by step instructions
The process of sculpting crafts is easy, takes a certain amount of time, but gives a chance to pay attention to your baby. With easy instructions and a few video tutorials at hand, parents can quickly figure out how to make a particular salt dough craft and explain it to their child. There are many product options, choose one or more and get started!
Flowers
The created products will look not only beautiful, but also believable. For example, to make a rose, minimal effort is required:
- From the dough prepared in advance, roll out the layer (thickness is not more than half a centimeter).
- With a round object in the form of a glass, squeeze out five identical petal elements.
- Lay the circles horizontally on top of each other so that each component is in contact, protruding by a centimeter.
- Roll the steps into one roll, and then place the whole structure on one side on a hard table surface.
- Spread the petals of the bud on the top of the flower from the center in different directions.

Toys for the New Year
Original decorations are made easily and quickly. If you don’t know what can be made from salt dough for modeling for the New Year, consider hanging toys for the Christmas tree. For manufacturing, you will need salt dough, colored paints and wire for fastening:
- Bell. It is necessary to roll out the ball, make a bell-skirt. Attach the tongue to the wire, which will serve as a fastener on the branches of spruce or pine. Dry the finished figure, decorate in bright colors.
- Pendant figurines. Make a figure with a cookie cutter. Poke a hole in the top with a toothpick or cocktail tube. After drying, paint the toys, and thread a dense thread or thin ribbon through the hole.

Crafts for February 23
The best gift for a man is a symbolic gift that can emphasize valor, courage and strength. Thanks to special molds in the form of a tank, a soldier, a ship, you can easily make a gift for February 23rd. To do this, roll out the salt dough into a layer and squeeze the selected shapes out of it with a shape. It remains only to dry the souvenirs and paint them in military color.
Souvenirs for March 8
Flowers are the best gift for Women's Day. Why not make them from salt dough? From plastic material, you can create a bouquet that will delight with its beauty for many years. An excellent gift for a friend, mother, sister, grandmother will be a vase of flowers:
- Make a mass according to the classic recipe, roll out a half-centimeter layer, cut a 15x10 cm rectangle from a piece.
- At the top of the figure, create a hole with a cocktail tube. This will make it possible to hang the product on the wall.
- Form a ball from the other part of the dough, roll it out and make a vase, slightly bending the neck. Attach to the prepared rectangular base.
- Roll out three stems, attaching them to the vase.
- Cut out circles for the bud and twist to form a rose.
- Oval figures will serve as petals on which to make stripes.
- Decorate the vase with voluminous balls or chamomile.
- Dry the picture, paint it, and cover it with a layer of colorless varnish on top.

For the holiday, you can make decorative eggs-pendants with which to decorate cabinet handles, windows, or make an original garland. To do this, you need an oval shape to squeeze flat eggs out of the material. On the top edge of the egg, make a hole for the ribbon with a cocktail tube or a cap from a felt-tip pen. Put the product on a baking sheet in the oven, dry it, and then apply the pattern you like on the eggs with acrylic paints or gouache. Attach crafts to a long ribbon.
Learn how .
How to make salt dough for modeling.
We take: 1 cup of premium flour, 1/2 cup of fine salt (not iodized!), ¼ cup of very cold water. Mix flour and salt in a bowl. Pour water in small parts, kneading the dough well each time. The amount of water can be different, it depends on the properties of the flour, so water should be poured in small portions. Knead until the dough crumbles and sticks to your hands. It will turn out very similar to plasticine. Store the dough in a closed container or bag so that it does not dry out in the refrigerator. Shelf life is three days. To keep the dough longer, you can add 2 tablespoons of citric acid during kneading. (UPD- It looks like citric acid somehow interacts with varnish for children's creativity, the first time I did it without it and the varnish was transparent, but now it's kind of whitish.)
How to color the dough.
You need to take a small piece of dough, make a cake and put a little gouache in it. Knead this piece until the dough is evenly colored. You can first mix the color on the palette, and then color the dough. But it is much more convenient to color the dough with the main colors, and then mix the already colored pieces until the desired new colors are obtained. For sculpting food, it is very important to repeat the color of what we are sculpting as accurately as possible.
For example - sausage color = pink + a little brown
pink = lots of white + little red
To sculpt food, you will need the following colors - white (a lot), pink, sand, brown, yellow, orange, green, red. And be sure to leave part of the test unpainted.

We sculpt almost like from plasticine. We take out the dough from the container in small pieces so that it does not dry out. If the dough is still dry, add a few drops of water. If wet, add a little flour. You can also dust your hands with flour. To glue individual pieces of dough, moisten the junction with water using a brush. We use improvised materials for modeling - a garlic press, a strainer, toothpicks and more.
How to blind:

Broccoli
Let's see what broccoli looks like. Mixing three green shades. From a piece of the lightest shade we sculpt a sausage, divide it into small segments - these are broccoli legs.
We squeeze our dough through a kitchen metal strainer, we get an interesting texture. We moisten the leg with water and “glue” on it what was pushed through the strainer.


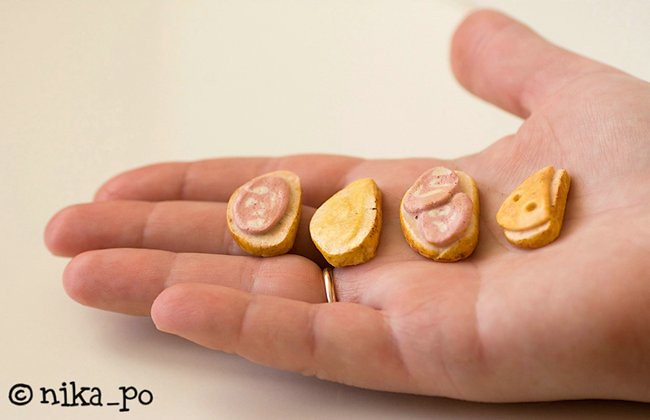
Sausage
We make a thin cake of sausage color. We lay thin strips of white dough on it. We turn the cake, roll it a little in our hands and put it in the refrigerator for a while. When it has cooled, cut the sausage into slices. We saw, but do not squeeze the dough.


Ice cream
We make a sand-colored cake, a ball and a cone of white. On the cake, with the back of the knife, we squeeze the cells, like a waffle. Let it lie down a little, dry a little - a piece that is too soft cannot be wrapped like a waffle. We make ice cream from white parts and wrap it in a waffle.

Cheese
Cheesy color = yellow + a little orange.
We make a cake, cut off the excess to make a triangular slice of cheese. With a rod from the handle we make holes, large holes with the back, small holes with the nose of the rod.

Bread and other dough products
We sculpt pieces of bread from uncolored dough, pies can be sculpted from uncolored dough or from sand-colored dough. We tint already completely dried products with crayons of oil pastels for children's creativity - we make a golden crust.


It is better to dry finished products simply in the air, on a smooth surface - for example, on a plastic file or oilcloth. When the top dries, turn over to dry the bottom.
When drying, the products turn a little pale, they must be covered with any varnish. It is better for children to use a special water-based varnish for children's creativity - it has no smell.

More
You can make a completely liquid dough (add water) and spread it. So you can depict butter on a sandwich or chocolate icing.

In order not to confuse with the sizes, it is good to try on while sculpting to the plate from which the toys will then be eaten.


We got to dessert.


Bon appetit:)
Testoplasty is a new exciting type of needlework, which involves the creation of a wide variety of paintings from salt dough. If earlier this type of needlework was intended to develop fine motor skills in children, today it is a full-fledged art form. Adult needlewomen create whole pictures from this material.
Why has dough molding become so popular? There are a number of reasons for this:
- It is not expensive. If any other needlework, be it embroidery, knitting or drawing, requires the purchase of quality tools and materials, then this needlework requires only flour and salt;
- It doesn't require any special skills. It is not at all necessary to graduate from an art history department or a sculpture school in order to create masterpieces;
- It develops. Modeling contributes to the development of thinking, imagination, the ability to compose a composition;
- It improves spatial thinking. With the help of modeling, you can learn to convey shapes, proportions and colors.
Dough modeling has been popular for a long time. The history of this needlework is rooted deep in history. Even with the advent of the first flour (about 6000 years ago), people began to sculpt various figures from ready-made dough, and later they became the first charms, along with herbs and stones.
Very often, for a skillfully molded amulet or figurine, people received an equilibrium price in gold.
Today, such paintings are very popular among craftswomen and needlewomen. Usually they consist of a canvas (a sheet of cardboard, canvas, etc.), on which various paintings are molded. They are not flat, but voluminous due to the texture of the material. Products are painted or varnished in order to subsequently decorate the interiors. Testoplasty is a full-fledged art form that you should definitely try to do!

Preparing salt dough for modeling is very simple. All that is needed is:
- flour - 0.2 kg;
- salt - 0.2 kg;
- water - 125 ml;
- vegetable oil - 1 tbsp. l.
If you need to get a multi-colored product right away, then you need to add a dye that dissolves in water to this recipe.

There are two methods of kneading. Both of them are good and are chosen according to personal preferences:
- Salt is mixed with flour until smooth (if desired, it is fluffed up with a blender), and then water is gradually poured into this mixture. The dye dissolves in water;
- Salt and dye dissolve in water, and then flour is gradually introduced into it.
It is necessary to knead the resulting mass hard. First, the dough must be brought to such a state in which it will not stick to the hands, and then beat on a wooden or iron surface. If it starts to crumble, then you need to add water, and if it sticks to your hands, flour. After kneading, it is highly desirable to keep the finished material in the bag in the refrigerator for 1-2 hours. And after that you can start sculpting.
A simple picture "Cat" from salt dough with your own hands
This work is done on a wooden background or on a cutting board. Transferring the drawing is not required, so the work is done on the basis of a sketch.
You will need:
- background or board;
- watercolor and gouache paints;
- paint brushes;
- salty dough;
- PVA glue";
- colorless varnish;
Master class with step by step photos:

How to make a picture with flowers from salt dough
"Daisies in a vase" - this is the name of this picture, and it is done quite simply.
You will need: 
- cling film or cellophane;
- salty dough;
- cardboard sheet or wooden plank for the background;
- matter (optional) for the background;
- toothpick;
- tassel;
- nail scissors;
- water.
Process step by step with photo:
- Salty dough is prepared according to a standard recipe and is divided into three parts: one is larger for flowers, the second is for the base for flowers and the third is for a vase. A cling film or cellophane is spread on a wooden background;
- A vase is formed from a piece of dough. She can be whatever the needlewoman wants. Here it is formed from 3 parts: the base is made from a large piece (it is rolled out and formed in the form of a vase), a stand and a handle are made from two smaller pieces;
- With the help of a knife, a drawing was made on a vase;
- Next, flowers are made;
- An oval is rolled out from the second part and is located on top of the vase - flowers will be attached to it;
- A small piece of dough is rolled into a slightly flat ball;

- With manicure scissors, he is “cut” into petals;

- Then, with the help of the thumb and forefinger, the “square” petal is slightly compressed and shaped. These steps must be repeated with each petal;

- The result is voluminous petals;

- With the help of a toothpick, veins are made on the petals;

- The place where the flower should be located is slightly wetted with water and the flower is placed there. It must be lightly pressed down using the back of the brush;

- Roll a ball from a small piece of dough - this will be the core of the flower;

- The core also needs to be slightly pressed down;

- And lightly prick the petals at the junction with the base with the sharp end of the toothpick so that they connect;

- Repeat this procedure with all the flowers;
- Once the painting is ready, it must be left to air dry until completely hardened;
- As soon as the dough dries, turn the picture down with the dough on a soft surface and carefully peel off the film;
- The background is pasted over with a coarse cloth (burlap, linen cloth) on both sides;
- Spread the back surface of the work (i.e. dough) with glue. It is best to take the "Dragon". And, without lifting the product, attach it to the fabric. Those. the lubricated surface itself sticks to the fabric;
- Then the work is painted with paints or varnished as desired;
- After the paint has dried, you can attach a frame to the background.
How to make a salt dough basket painting
The picture is made on a large sheet of parchment paper - it lags behind more easily after drying, without spoiling the picture itself. You can also use cling film or work on a ready-made background.
Required:
- dough ingredients or ready-made salt dough;
- parchment paper - 1 sheet;
- sharp knife or stacks;
- garlic press;
- paper basket and leaves template;
- paints and brushes;
- water for wetting;
- cloves - 3-4 pcs.
Master class for creating a picture with your own hands:

Some useful tips for needlewomen:

Salt dough is fun to make. You can involve children of all ages in this activity and it will become not only entertaining leisure, but also useful!
Another tutorial on making salt dough flowers is in the next video.